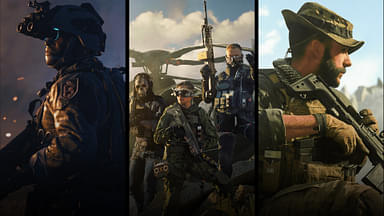

MW3 Zombies has gotten off to a great start and the COD community is enjoying what Activision has made of this game mode. Most players right now have memories of Black Ops II Zombies with Pack a Punch and Ray Guns. Well, we are happy to report that these are back in MW3 along with so much more.
In this guide, we are going to break down the important bits of MW3 Zombies including the essentials like loading creation, Field Upgrades, Acquisitions, and more. Let us see how this Zombie Mode differs from anything else we have gotten in previous Call of Duty Games.
Contents
- The Definitive Guide to MW3 Zombies
- What is Modern Warfare 3’s Zombies Mode?
- Loadout Creation
- Insured Weapons
- Field Upgrades
- Acquisitions
- Acts and Tiers
- Urzikstan (Threat Levels, Camps and Strongholds)
- Threat Levels
- Contracts
- Strongholds and Aether Nests
- Boss Fights
- Extraction
- Tips and Tricks for MW3 Zombies
The Definitive Guide to MW3 Zombies
MW3 Zombies is much more different than any other Zombies mode we have had in Call of Duty history. We are going to break down the whole structure of the game mode in these next sections. This mode is much more focused on cooperative gameplay and teamplay rather than easter eggs or any other fan service.
However, it is one of the most enjoyable game modes for people who are tired of multiplayer and want a change of pace. Let us see why it is such a breath of fresh air for the MW3 community.
What is Modern Warfare 3’s Zombies Mode?

Modern Warfare 3’s Zombies Mode is one of the most fun game modes since it is entirely focused on PvE content. Essentially, it is a hybrid between MWII’s DMZ mode and Outbreak from Black Ops Cold War. What that means is that players can drop in, complete missions, and contracts, or just roam around gathering materials. There is a certain time limit after which the map becomes unhabitable.
Players should extract before the time limit is up so they do not lose their progress in the match. You can deploy in the Zombie map, Urzikstan, with a squad of three but you can get up to six people at once in your team. The objective is to team up with other teams and ensure that you can take down Zombies with your advantages at hand. Here are some things you should remember:
- 24 Players can drop in on the map every match. Up to six players can form a squad and create an alliance to defeat Zombies
- The time limit for any given match is 60 minutes. Finish all of your objectives by this time
- Extracting with items in hand allows reuse in the next match
Loadout Creation

Next, we move onto one of the most important parts of this mode or any other, which is the loadout creation. Just like multiplayer, you have the option to customize the weapons you want with attachments. However, there is a catch. The catch is similar to DMZ mode in MWII. Before we get into that, you must understand that you are allowed to carry the following into the match.
- Two Weapons
- Field Upgrades
- Lethal and Tactical Grenades
- Acquisitions
Now, there are two kinds of weapons you can carry. One is the Contraband weapons and the others are Insured Weapons. We will take a look at the Insured Weapons in the next section. Contraband Weapons on the other hand are default weapons that come with attachments that you cannot change. These are the weapons one starts with if they are playing Zombies for the first time.
Once you extract any weapon or acquisition, they will be added to your stash. Now that we know what Contraband weapons are, let us take a look at what Insured Weapons are and how you can obtain them.
Insured Weapons
Contraband Weapons can get a little unreliable because of their nature. Those unfiltered attachments will only get you so far. That is why, Insured Weapons are the way to go. You can get Insured Weapons by extracting them from the map. Should you fail, any weapon that you already had in an Insured slot is going to enter a cooldown, you can use the weapon again after the cooldown is over.
Now, the best part about Insured Weapons is that you can use Gunsmith to equip your favorite attachments on the weapon. In addition, there are attachments tailored to Urzikstan and the Zombie Mode you can use on those weapons to give you an extra buff. Now, to reduce the cooldown for your weapon further, extract the map with as much essence as you can.
Field Upgrades

Instead of Field Upgrades that provide certain utility in niche scenarios, these Field Upgrades are active or passive effects which will be pretty useful in battle. There are six primary Field Upgrades you can choose from in the Zombie Mode. Let us break them down.
- Aether Shroud: With this Field Upgrade, you can turn invisible to Zombies for five seconds. It has a medium recharge.
- Energy Mine: It is an explosive mine that damages enemies who set it off. It has a medium recharge.
- Frenzied Guard: This ability repairs your armor and forces Zombies to attack you for 10 seconds. Every kill you get repairs your armor as well. It has a slow recharge time.
- Frost Blast: Short and simple. It sends out an ice blast that damages and slows enemies caught in the radius. It has a medium recharge time.
- Healing Aura: Revives downed allies immediately. Otherwise heals every squad member up to their max HP. It has a slow recharge time.
- Tesla Storm: Lightning connects you and your teammates for 10 seconds. This damages and stuns enemies. It has a slow recharge time.
These Field Upgrades are situational but very useful when you are surrounded by enemies and want to regroup with your teammates. Healing Aura is going to be a really useful ability when you get cornered. Energy Mine is a good investment if you don’t want enemies sneaking up on you.
Acquisitions

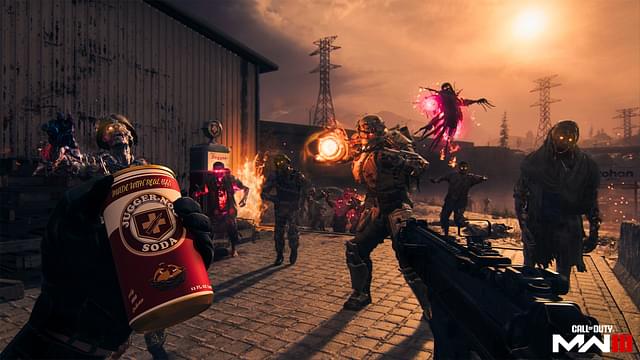
These are tools that you can use only once. These are really useful items that include Killstreaks, Perk-A-Colas, Aetherium, and Schematics which can be used to craft things including the Ray Gun. That being said, let us take a look at what these are in brief.
Killstreaks have the same effect as in the multiplayer. Perk-A-Colas on the other hand have passive and active effects and work until you are downed by Zombies. There are lots of these Perks you can acquire ranging from the classic Juggernog to the PhD Flopper that can provide immunity to explosive damage.
Now, Aetherium and Schematics are where things get a little interesting. Aetherium crystals essentially help you upgrade the quality of your perks without spending any essence. You can find Schematics by doing certain quests or in harder zones. These Schematics can also help you create Acquisitions.
Acts and Tiers
Acts are essentially Faction Quests from MWII’s DMZ mode. Within these Acts, you have Tiers that are objectives to achieve to get rewards. You can only activate one Tier at a time although you can achieve multiple objectives in a game. As you keep completing more tiers, the missions get harder, the same as DMZ modes. Once you complete all the Tiers in an Act, you will receive a bounty of rewards.
Now, the reason why completing these Acts and Tiers is important is because they are the singular way to unlock more Insured Weapon slots. There are three total Acts available thus far. However, these can expand in seasons going forward.
Urzikstan (Threat Levels, Camps and Strongholds)
In total, you have 60 minutes to complete your tasks. You will be spawned at the edge of the map and you won’t have any immediate objectives to fulfill. Once you do spawn in, you have close to 45 minutes to complete objectives, gather equipment, or do anything else. Once those 45 minutes have passed, the Zombie outbreak intensifies and the purple zone that is full of radiation will grow. It will keep growing until it engulfs all of Urzikstan.
We recommend that you spend the majority of your time acquiring Essence. This is the currency you will use to purchase weapons, perks, and Pack-A-Punch. The major chunk of Essence you can get is through completing contracts but you can also get some by killing Zombies. Now, a weapon’s rarity determines its damage. The rarer it is, the more damage it will do against Zombies.
You can upgrade your weapon’s rarity by using Aetherium Tools which are acquired through Contracts and inside containers. The rarity spans from a White color for a Common and then an Orange Color for a Legendary variant of weapon.
Threat Levels
There are three different Threat Level phases present in the MW3 Zombies Mode. They are divided into three categories which are Low, Medium, and High Threat Levels. Let us break down the uniqueness of each threat level and why you should be aware of it.
- Low Threat: In these areas, you have low-quality loot along with weak Zombies and contracts that offer lower-quality loot. These are mostly outer areas of the map with white-colored borders.
- Medium Threat: The orange-colored area of the map. There is loot of higher quality found here in addition to tougher Zombies and, sometimes, special Zombies as well.
- High Threat: The red-colored areas of the map which is typically bordered with the red color. Mostly found in the center of the map. You can also find the highest quality of loot here in addition to special Zombies and bosses.
Although for the first few games, we recommend that you stick to the white areas of the map, the Medium Threat areas are a nice blend of challenge and fun for the players accustomed to Zombies and DMZ modes.
Contracts
This is going to be the ideal source to obtain Essence which will later be used to upgrade the quality of your weapons. Getting Contracts is an essential part of progression in this mode. The Contracts only have a single objective that you need to accomplish but they offer a large reward payout of Essence. That is why, we recommend completing a couple of Contracts so you can rack up a pool of resources.
In addition, every time you complete a Contract, you get a loot cache consisting of rewards such as weapons, Aetherium Tools, or Perk-A-Colas. Open your mini-map, find a contract, complete the objective, and obtain the reward, it is as simple as that.
Strongholds
Just like the DMZ mode, the Zombies mode in MW3 also has strongholds consisting of AI soldiers. You will require a stronghold key to enter these premises but it is fun to infiltrate them, especially if your Tier Objective calls for it. In addition, there are mercenary camps scattered around the map with tough AI opponents not to be taken lightly.
We recommend taking a long-distance approach and using an AR or a BR if you desire. There are armored patrols as well which you will need to take down sometimes depending on the objectives of the Contracts.
Infested Strongholds and Aether Nests
Now, some strongholds are infected with a virus that can easily down your character in seconds when exposed. You can only remove the infestation if you can destroy glowing cysts inside the walls of those buildings. Before you enter the building, however, we recommend that you equip or find a gas mask to use.
There is a ton of work that goes into clearing these buildings but it has one good thing about them. Once you clear them out, there are tons of rare weapons, Perk-A-Colas, and more to loot from containers inside. However, we only recommend attempting to do this if you are in a squad otherwise it is too much of a hassle. Even before that, loot a ton so you have adequate resources to survive inside an infested stronghold.
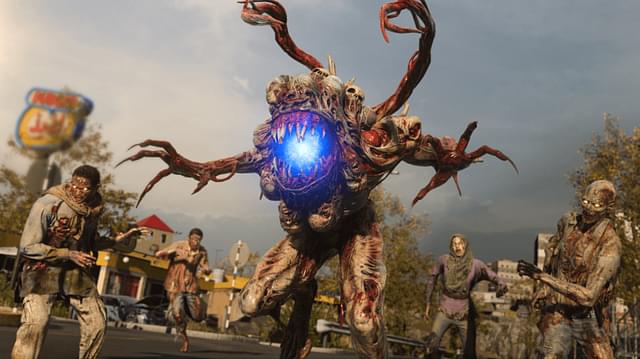
Boss Fights
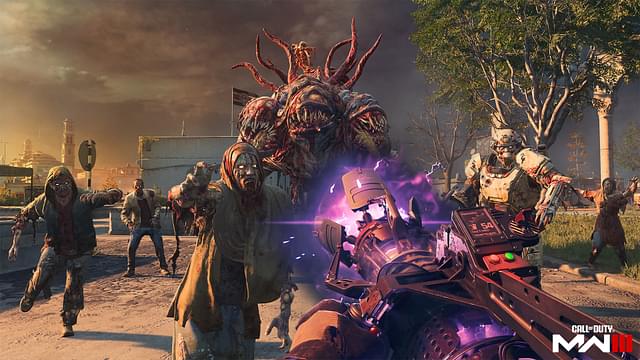
Smack dab in the middle of Urzikstan lies the red zone or the High Threat level area which we do not recommend venturing into. Even if you want to, we recommend doing it only if you have a Contract or an Act which requires you to face and kill the horrors present there. We are talking about mutated juggernauts, special Zombies, and more enemies that can eat bullets for breakfast.
These are extremely tough enemies that have no remorse and can easily destroy your team if you do not have the equipment for it. Venture to the center only with adequate firepower and a proper reason to do so.
Extraction

Once everything is done, it is time for extraction. Before we even venture into what extraction is, it is important to note that any weapon upgrade status, Perks, or Wonder Weapons you have will be lost and converted into Essence which will help reduce the cooldown of the Insured Weapons. So use everything before you think of extracting out of the map.
Now, the MW3 Zombies Extraction points will reveal themselves a while after you drop in. You have to find them on the mini-map. When you are done with the objective or finished what you wanted to, you can call in a helicopter for extraction. Once you do, green smoke is going to flow out of the extraction point.
Zombies will start to spawn around you and the objective will be to survive until the chopper arrives. You should also remember that the chopper will leave in 45 seconds. You and your squad have to board the chopper before the timer is up to extract. There are no limits to the number of extractions you can attempt in the first 45 minutes of the match.
For the last 15 minutes, there will be a final extraction point which will appear on the map. The High Threat Zone will expand in those last minutes. Therefore, if you miss that final extraction, you will lose all progress made from the match.
Tips and Tricks for MW3 Zombies

Now that you know everything there is to about the MW3 Zombies mode, let us take a look at some tips and tricks you should remember for any situation in the game mode.
- Spend the first 10 minutes looting everything around you. This ensures that you can go without equipment or ammo for the rest of the mission and allows you to focus on the objective you set out to carry.
- Use the Zombie swarm that spawns upon exfil request to level up your weapons. Call in exfil, wait for the chopper to leave, and repeat until your weapon is fully leveled up.
- Join other squads to form a six-person squad to ensure maximum firepower when entering a High Threat Zone or completing any other objective. The more people you have, the better the chances of survival.
- Ensure that your squad has at least one vehicle with you at all times. You can use it for cover, transportation and so much more.