In this edition of How to Minecraft, we will look at the process of making one of the essential things in the game; a Torch.
Minecraft is a game that has simple things appear more meaningful. One of those items is a torch. If you are a beginner, it is pretty easy to be overwhelmed by the number of options.
To make a torch, you will need a stick and coal with a particular alignment. Let us look at a step-by-step approach.
If you are more of a video person, look at the tutorial below.
How to Minecraft: Make a Torch (Step by Step)
Step 1 – Making Sticks
Firstly you will need to make one of the two ingredients. We will look at making the stick in this section.
Place two wooden plank blocks on the crafting table and create the sticks. The steps are pretty simple; not much to discuss.
This stick will combine with coal to make a torch. To mine coal, you will need a pickaxe, which we will see in the next section.
Also Read: 5 Beginner Minecraft Tips
Step 2 – Making a Pickaxe
The next step is to create a wooden pickaxe to mine coal.
To create one, go to the crafting table and place wooden planks on top of the crafting boxes in all three above boxes. Next, place two sticks, one below the other, in the next row.
This step will create a pickaxe which you can use to get coal.
Step 3 – Mining Coal
You can mine coal using the pickaxe in many places. However, the most prominent ones are stony hills, caves, and on the side of multiple mountains.
Now the final step.
Also Read: How to Update Minecraft Bedrock Edition
Step 4 – Making a Torch
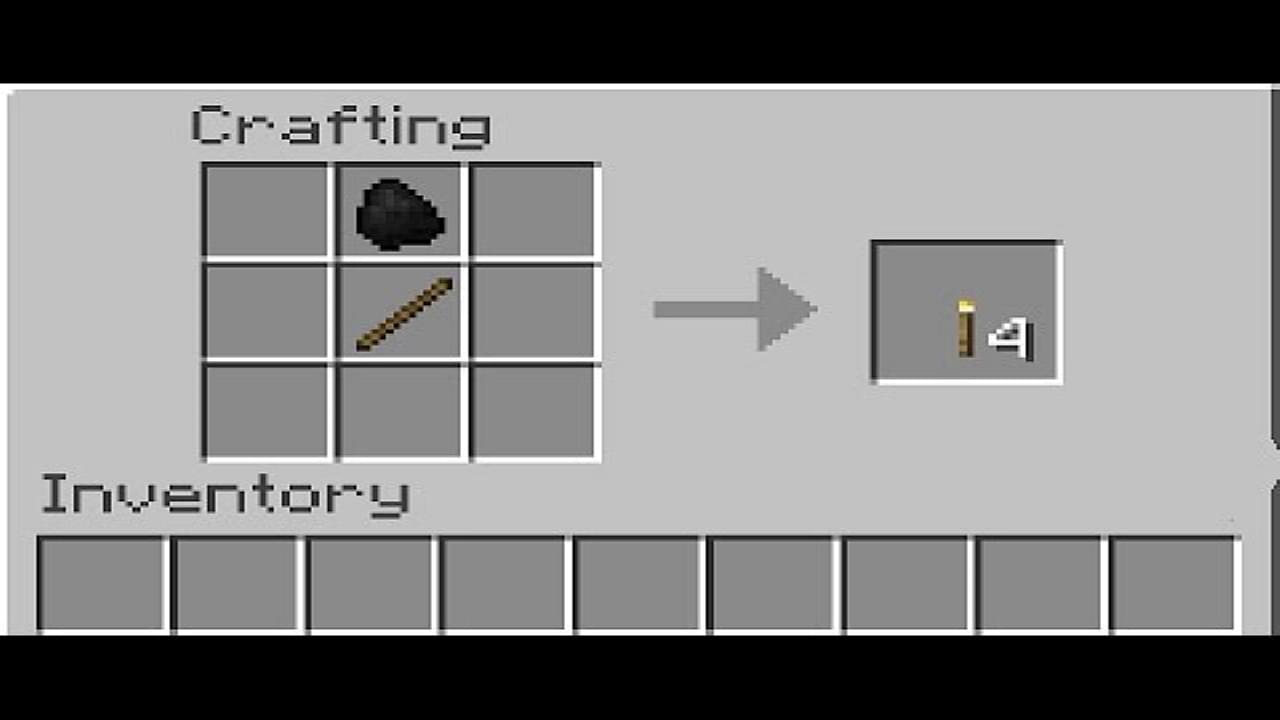
Now the last step is to combine both ingredients and create the torch.
In the crafting GUI, place a lump of coal in the middle and a wooden stick below it. You do not need the crafting table to make this equipment.
Please Note: When making a torch, players should always place the piece of coal above the stick.
One coal piece makes four torches, so you will have an abundance of toches when exploring caves.
You can also place the torch on cave surfaces by right-clicking on the block you want to place it on.

